With FeedHive's automation feature, we can build advanced, custom workflows that integrates with the many automation services out there.
In this article, we will learn how to set up a trigger.
What is a trigger?
A trigger is a URL that we can call in order to make FeedHive do something.
This is also known as an API endpoint - in FeedHive, we simply call this a Trigger URL.
When setting up a trigger, we can pre-configure FeedHive to take certain actions which will happen when we call the URL that FeedHive creates for us.
Let's take a look at which actions we can make FeedHive take.
Publish a draft
Let's set up a trigger to publish a draft that we have already created.
The first thing we'll do, is to create a new draft.
Let's do that by writing a post on the Compose page, but without scheduling it.
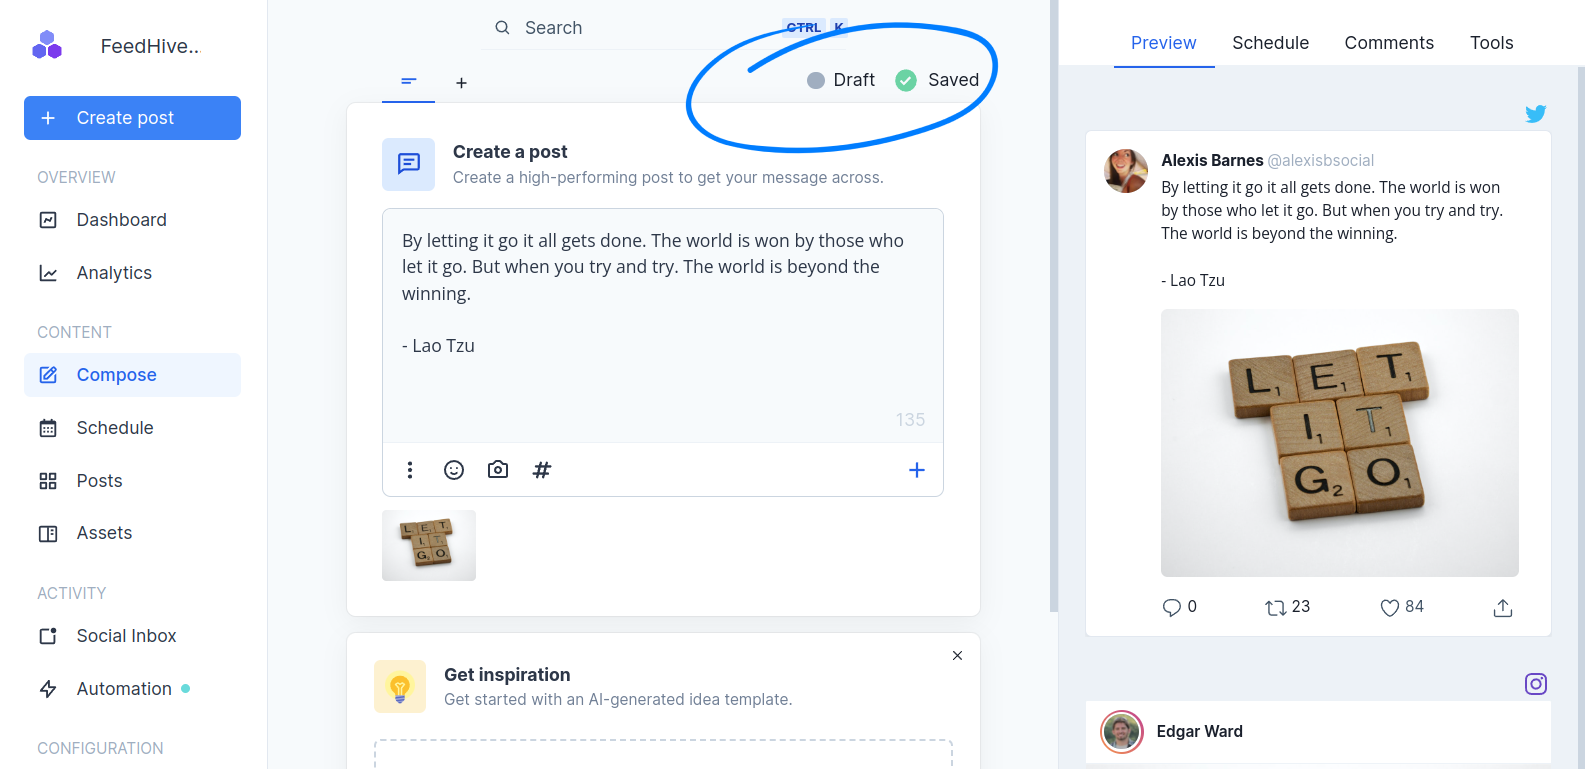
Next, let's go to the Automation page and create a new Trigger.
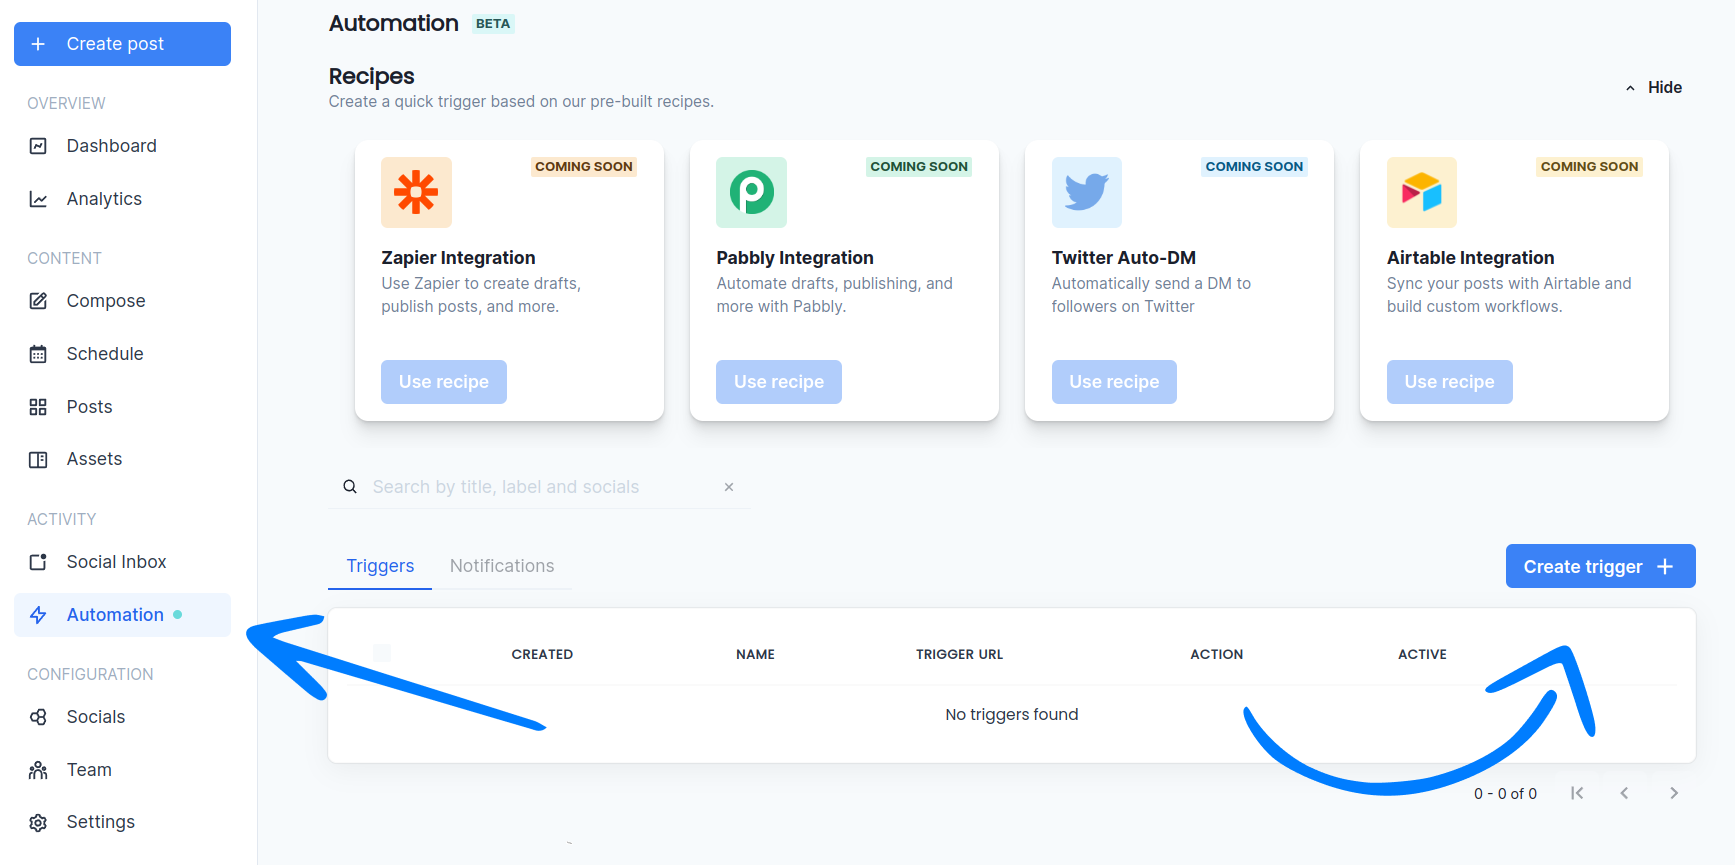
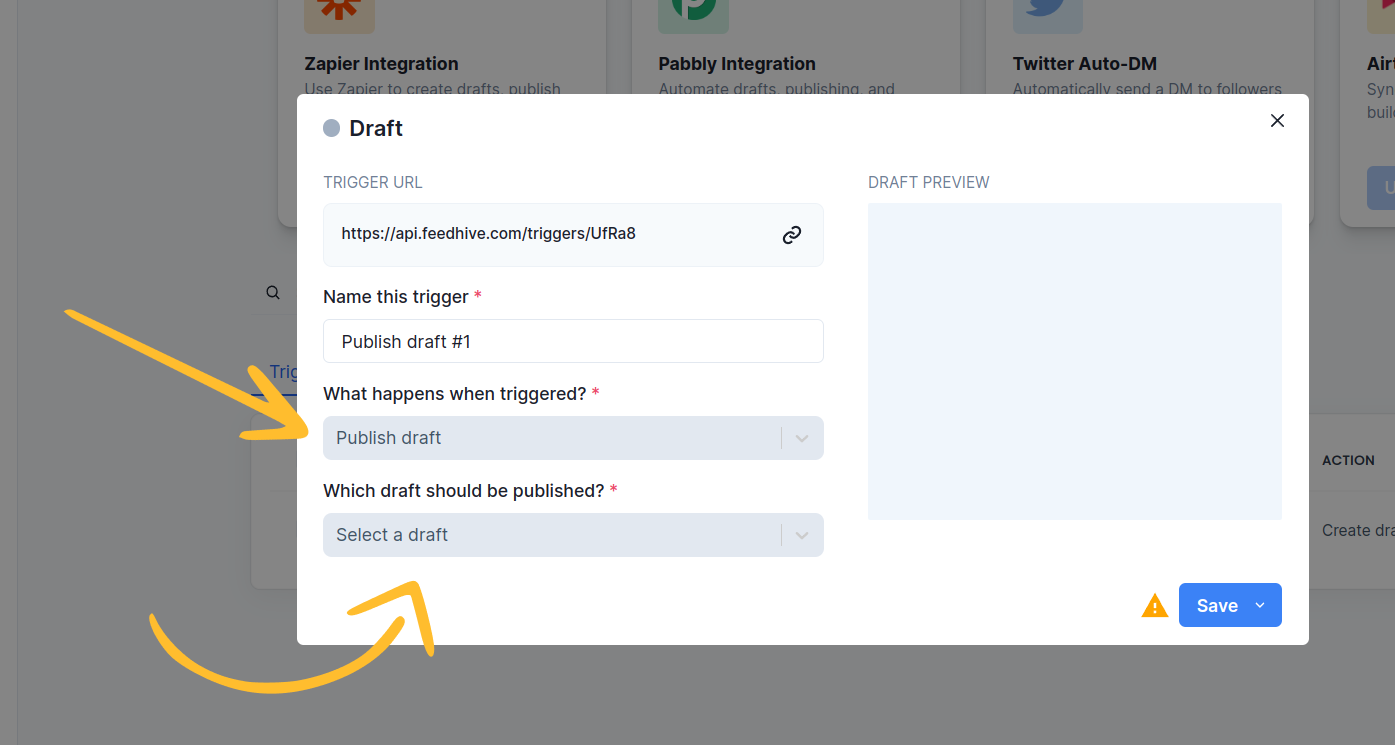
FeedHive will create a draft trigger for us.
Under "Trigger URL", you can see that FeedHive already created the URL we will be using.
We want to pick Publish draft under the field "What happens when triggered?"
Then we click Select a draft under the field "Which draft should be published".
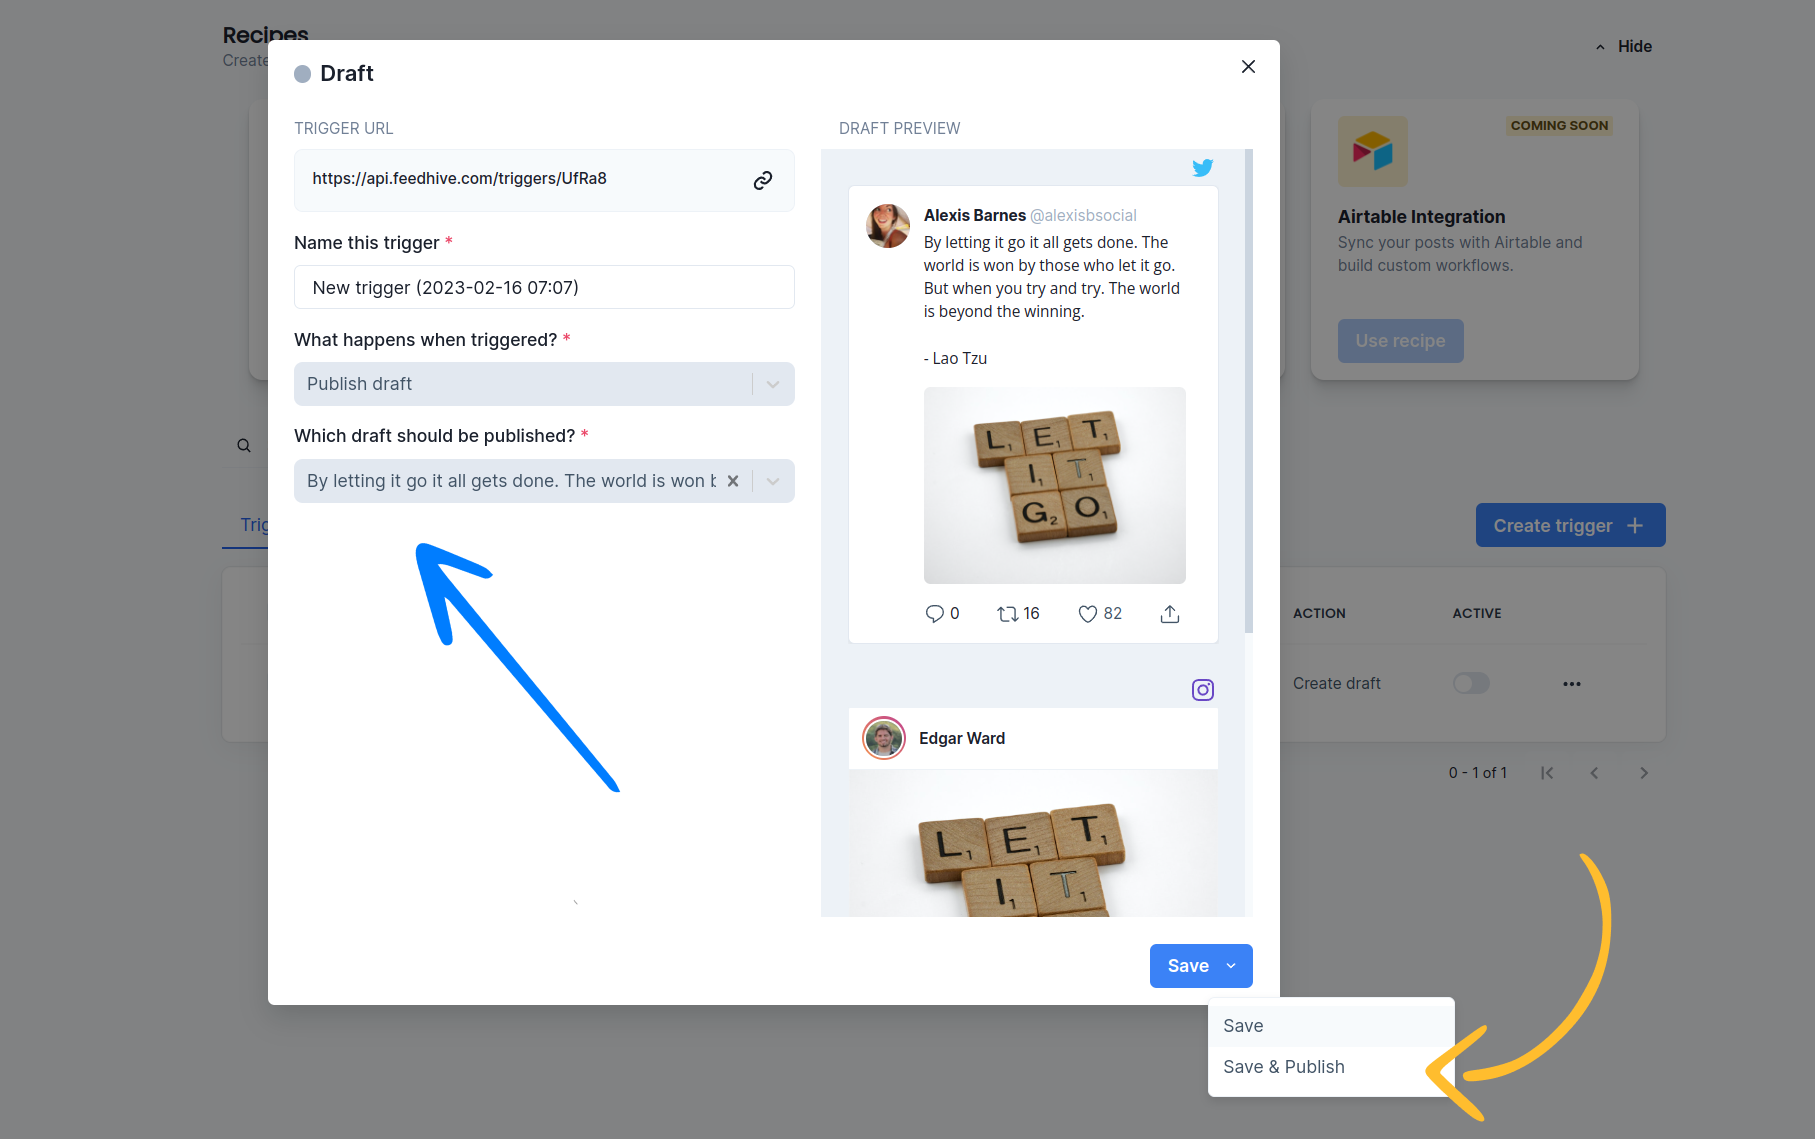
Once you have selected the draft you created, you will see a draft preview on the right side.
Finally, click "Save & Publish" to publish this trigger.
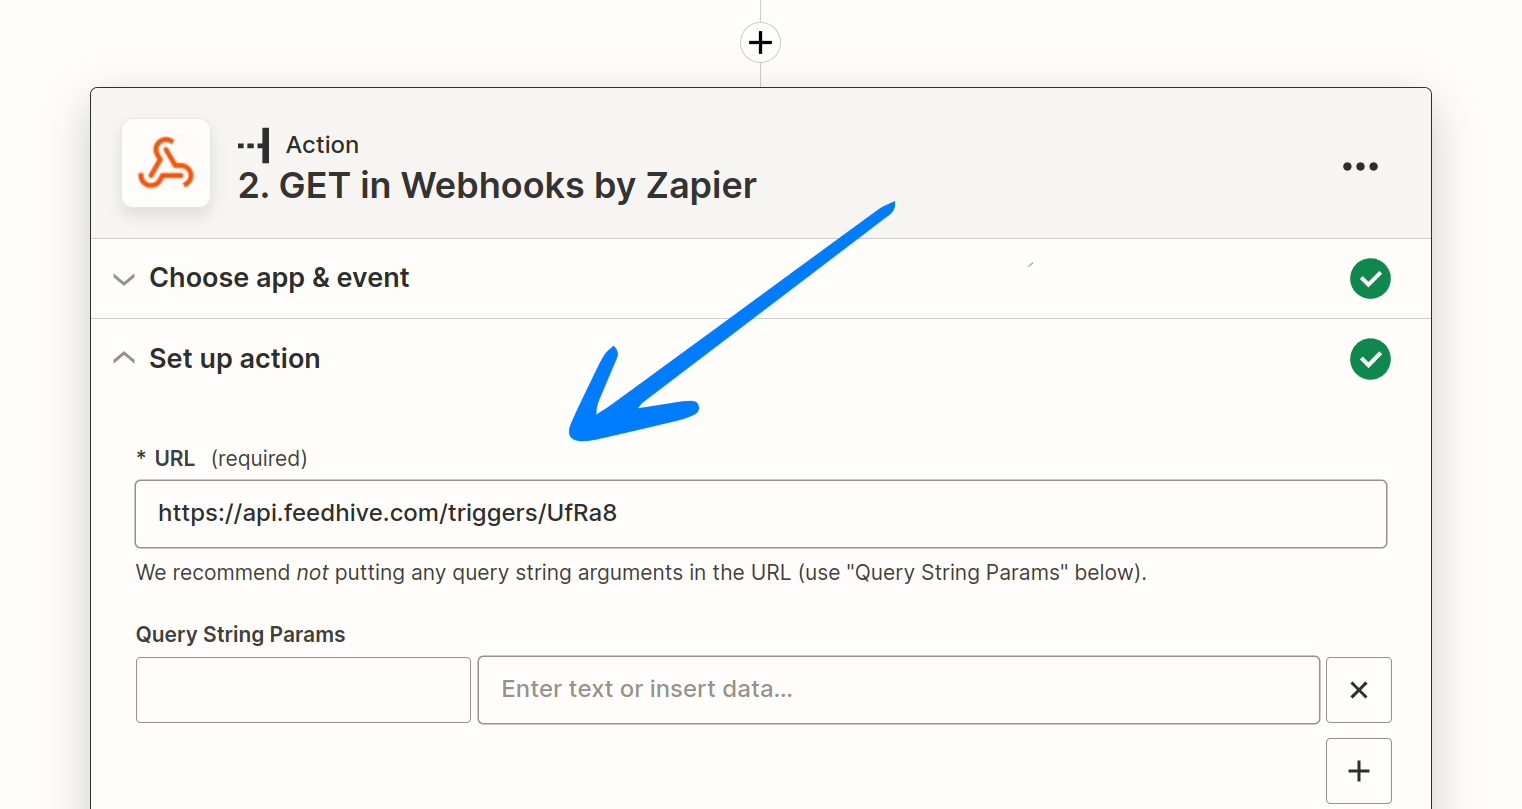
Now you can use the Trigger URL in any workflow service that allows sending GET requests - or you can incorporate it into a custom workflow that you have developed yourself.
Here is an example of how you can use it with Zapier.
This will publish your draft when a Zapier run is triggered by some event.
Create a draft
Next, let's set up a trigger to create a new draft from scratch.
A draft from scratch
Just like before, we go to the Automation page and create a new Trigger.
This time, we will pick Create draft under "What happens when triggered".
When we use this setting, we also get the option to pick a label and choose which social accounts should be selected for this draft.
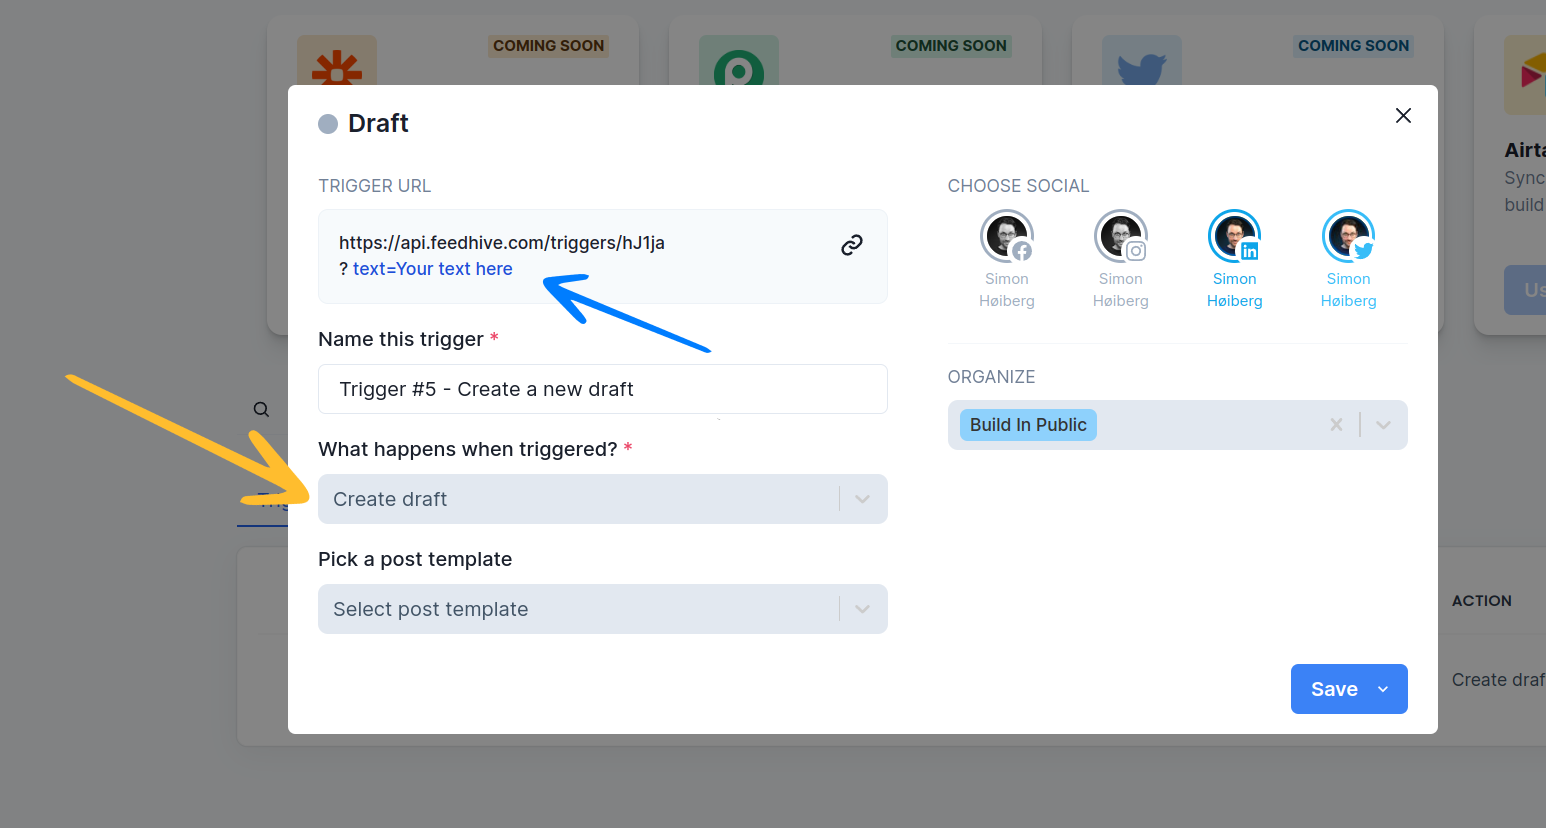
Notice how we get something extra added to the Trigger URL.
This is called a query parameter, and we will use this to tell FeedHive which text should be added to the draft through the trigger.
FeedHive create a query parameter with the name text.
You can use this query parameter to pass in any text you want from where the Trigger is called.
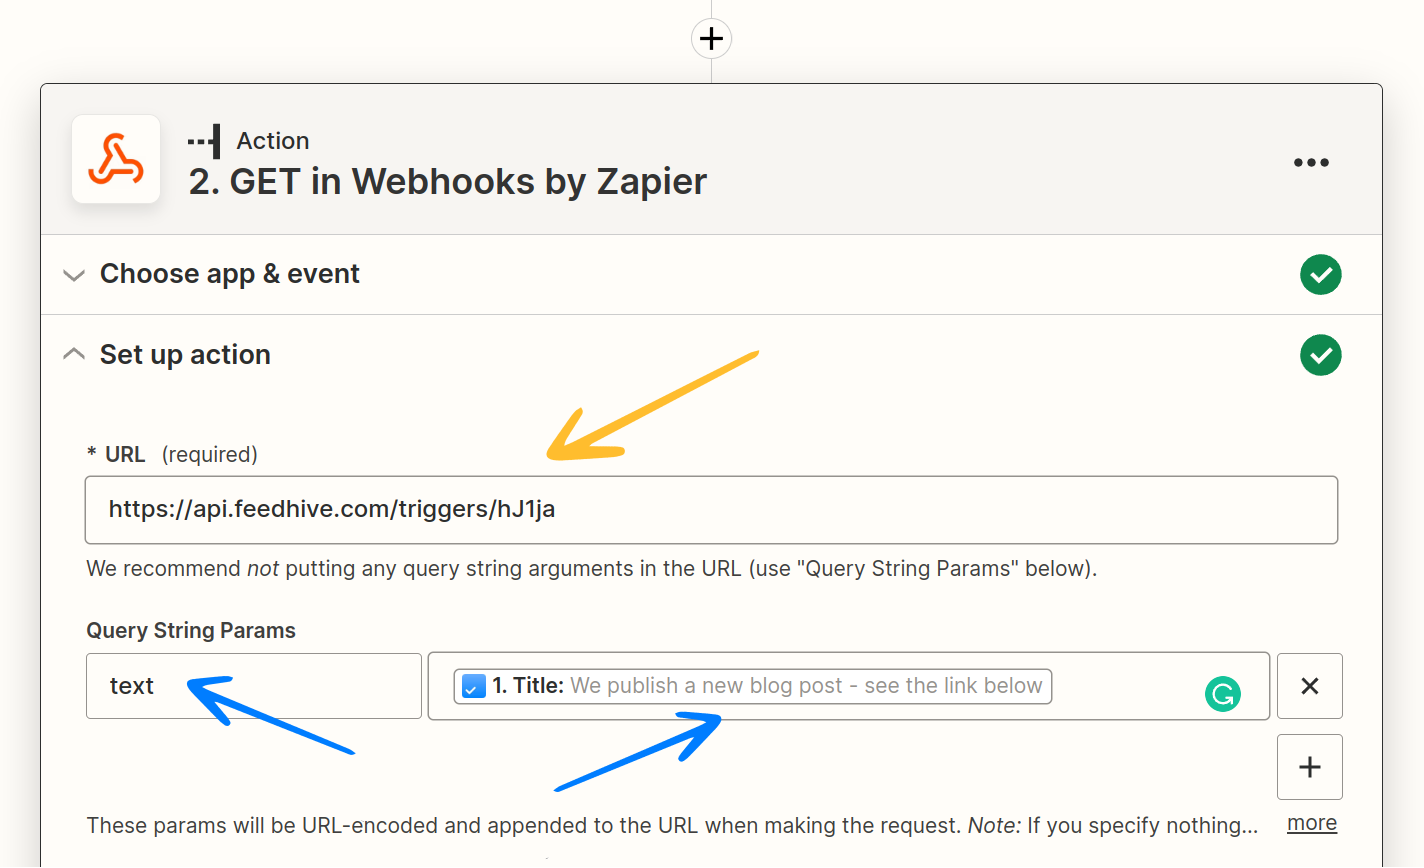
In the example above, we're using Zapier to react to a new to-do item created in the app Any.do. It will then call the FeedHive trigger and use the title of the to-do item as the text of the draft.
Of course, this is just one example.
The options are almost endless.
A draft using a template
Sometimes adding the entire text through the text query parameter gets a bit tedious and repetitive.
Fortunately, FeedHive also allows you to use a post template, which can contain images, video and inline Trigger Variables as well.
Go the Assets → User Templates and let's create a new template.
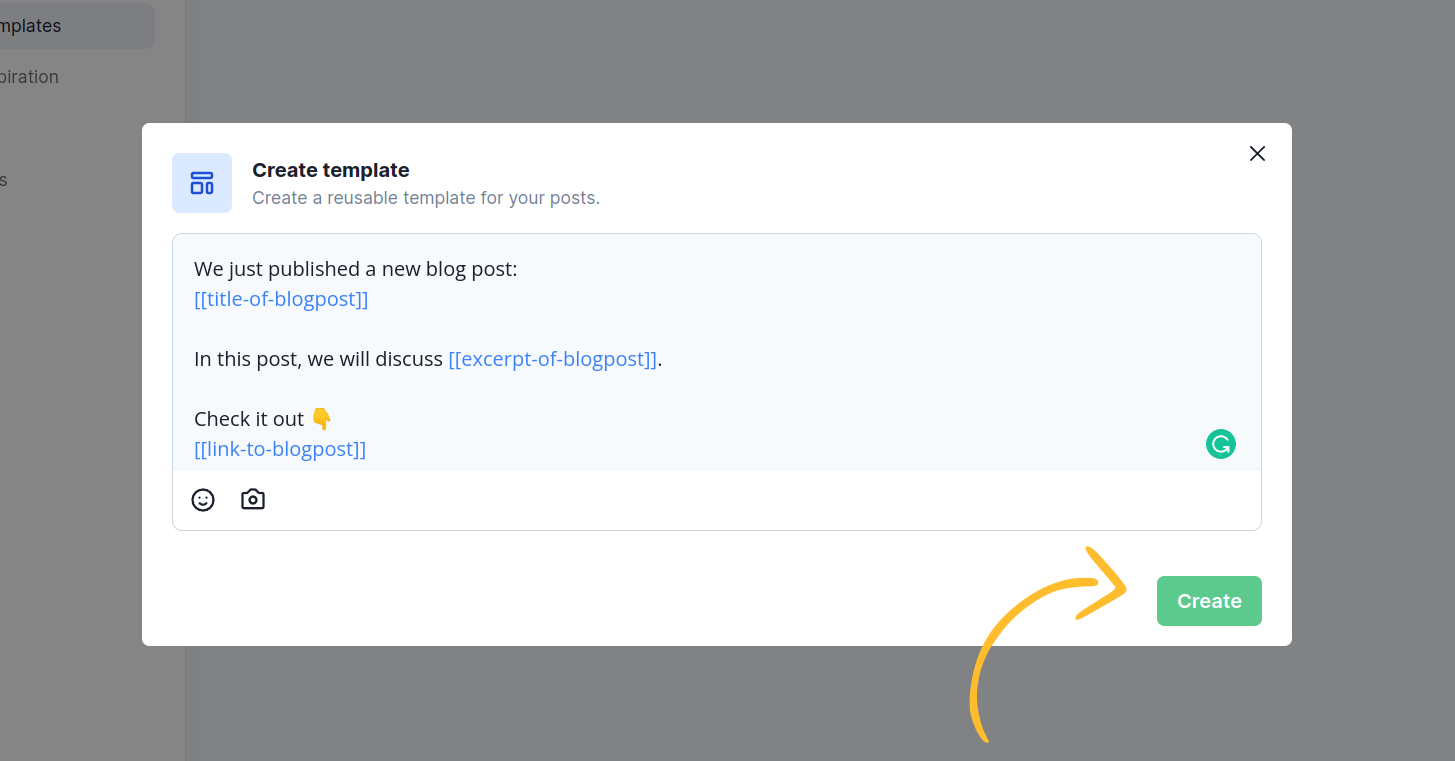
Notice that we are using 3 Trigger Variables in this template: title-of-blogpost, excerpt-of-blogpost, and link-to-blogpost.
A variable can be anything you want, all you need to do is to wrap it in two square brackets: [[name-of-variable]].
When you're done, click Create to save this template.
Now, let's go back to the Automation page and set up a new trigger.
This time, we pick a template under the field "Pick a post template".
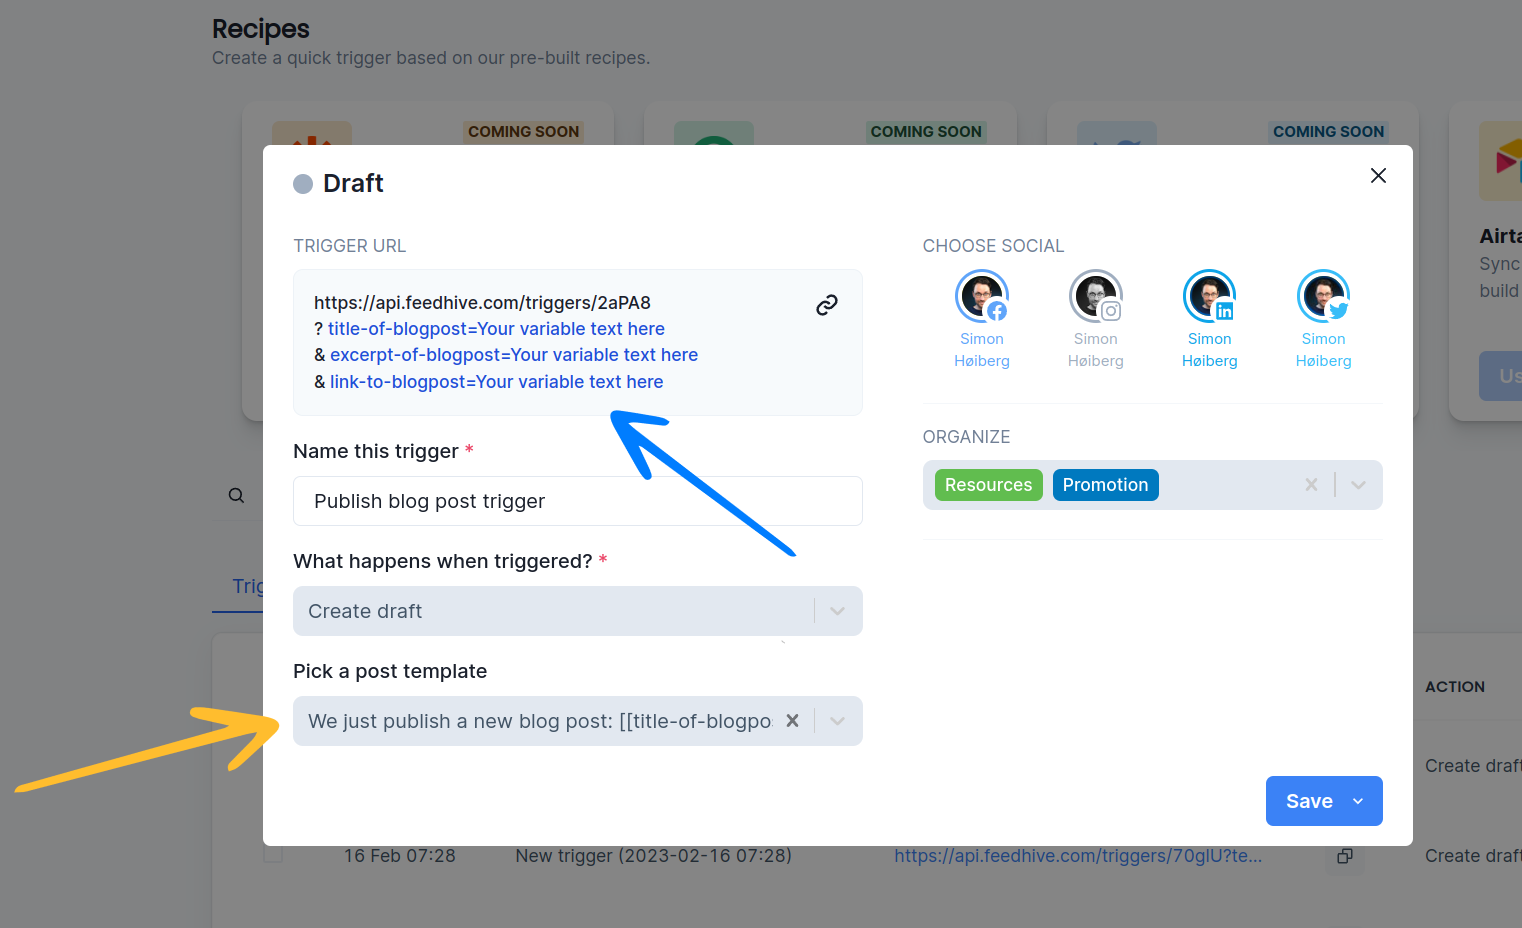
Notice how FeedHive automatically adds the Trigger Variables from the template as query parameters.
We can now use this trigger to automatically create a new draft every time a blog post is published.
For instance, we could use Zapier to listen to an RSS feed and automatically create a draft when a new blog post is live.
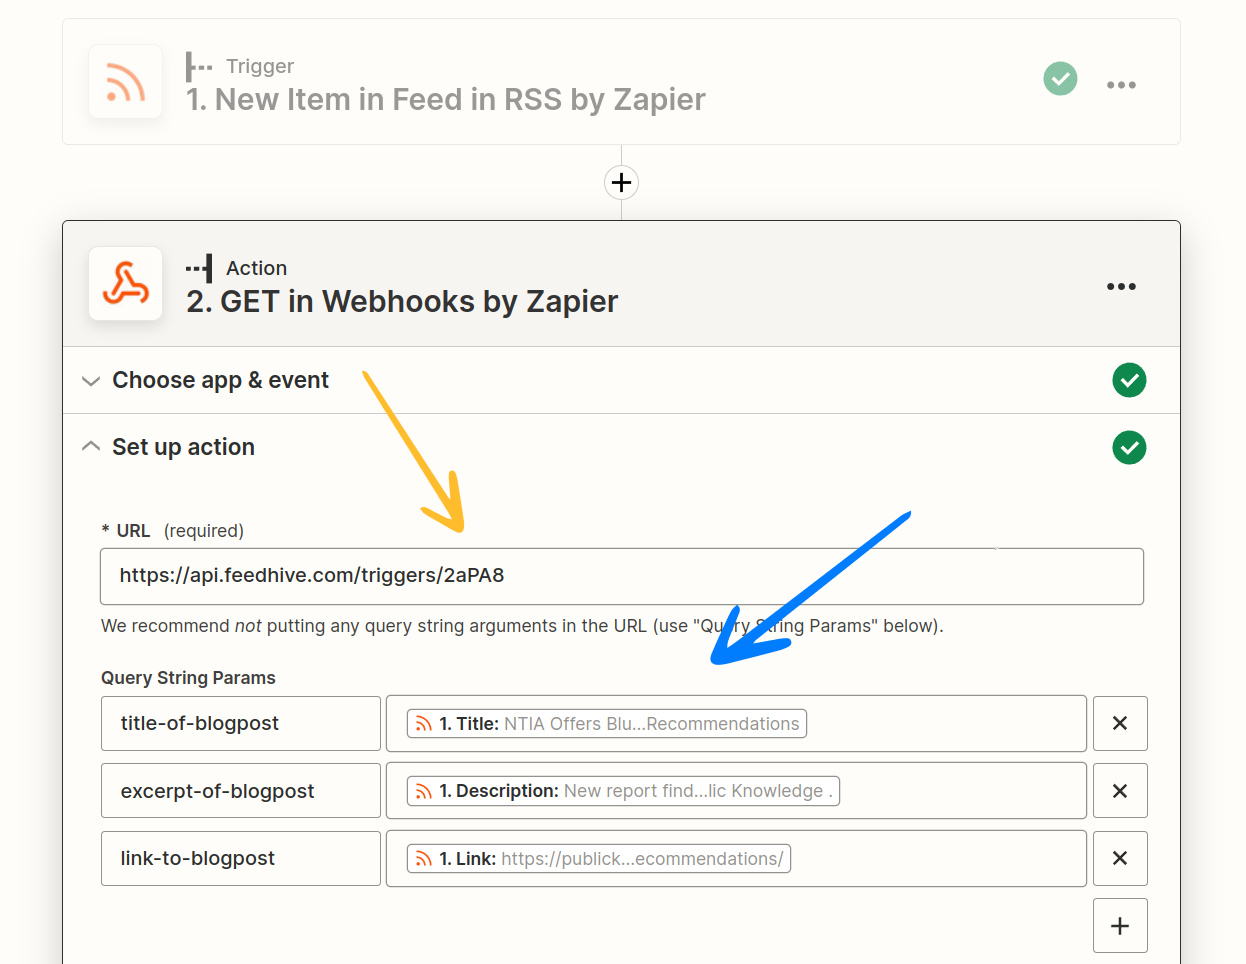
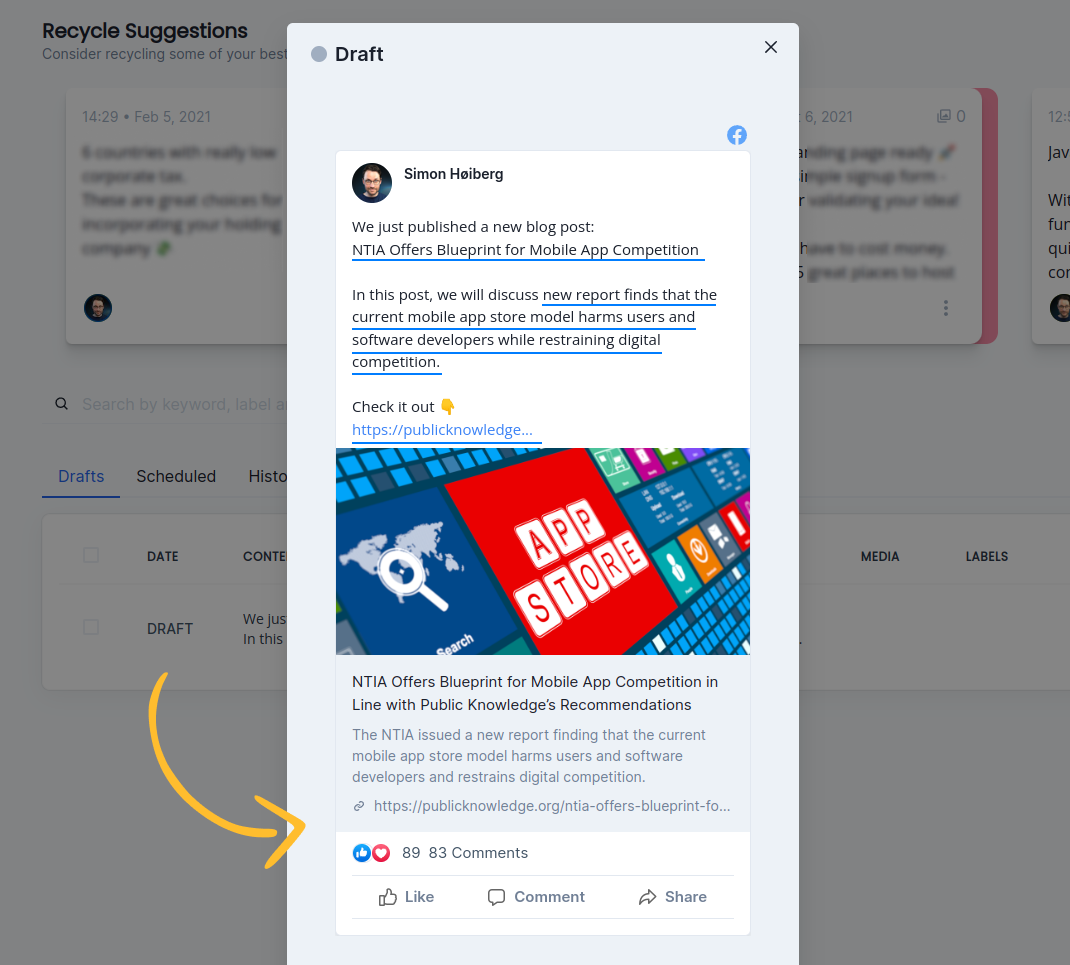
When this Zapier runs, a draft will be created in FeedHive, and all the variables will be substituted with the values from the query parameters.
Create and publish a post
Finally, you can also create and publish a post directly using a Trigger.
For this, pick Create & Publish post under the "What happens when triggered?" field.
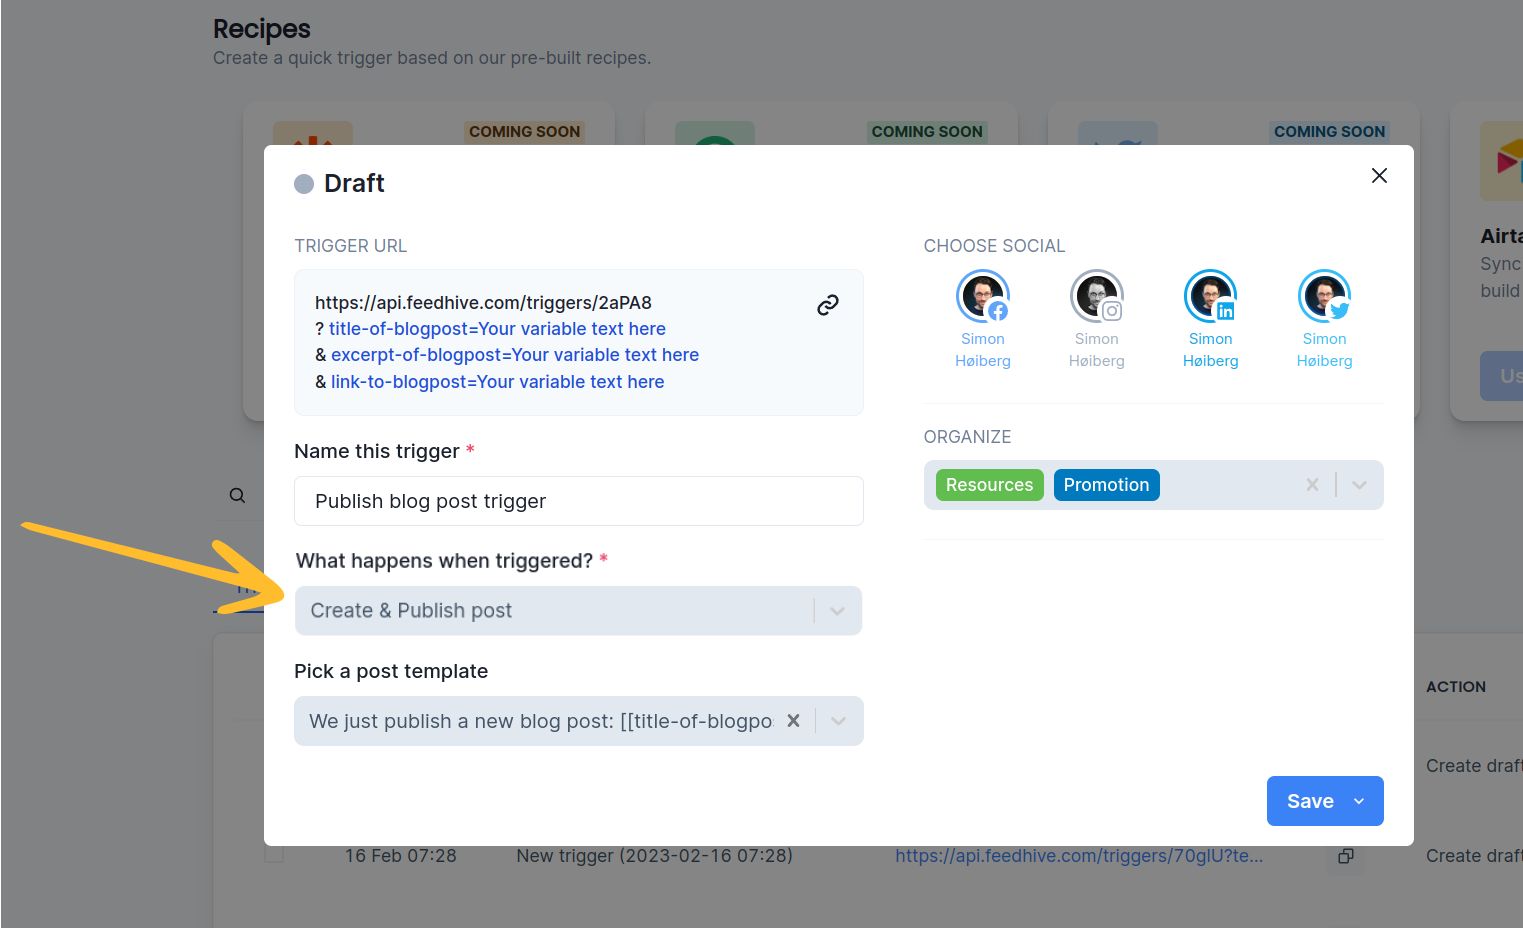
This works in exactly the same way as with a draft.
The only difference is that this draft will be created and then scheduled to go out immediately.
Other examples
Check out how Pete uses FeedHive Triggers and Make to sync draft posts between FeedHive and a Google Sheet document.
Known constraints
Currently, Triggers don't allow you to pass media (images, gifs and videos) to the trigger using a query parameter.
This means, that if you need to include media in a post (some socials require this, e.g. Instagram and Pinterest) - you need to either use the Publish draft method and prepare a draft with media already attached, or use a template that has media already attached.
FAQ
- Will media through a query parameter become available?
Yes, it will. We are working on that already.
- Can I use triggers with Zapier directly? Without having to use the GET request option?
Not at this moment. But we are working on integrations with a lot of services - Zapier, Airtable, Pabbly (just to name a few). These will be available as so-called "Recipes".
- Can I use FeedHive automation the other way around? Have FeedHive call a webhook when something happens, e.g. a post has published.
We are working on it. We call this "Notifications" and it will be available soon.

